The content of this blog, including my art and worksheets, are copyright protected. I do give permission to reproduce for personal and classroom uses a reasonable, limited amount of my content. You do not need to contact me to ask for permission. All other use is forbidden. For more details see the permissions and restrictions statement in the footer. Please use the Paypal button to make your donation.

Thursday, November 29, 2012

How To Add Texture In Drawing, 11/29/12

DRAWING LESSON WITH TEXTURE
SPECTRUM ART 1, 11/29/12

How to add texture in drawing is an art lesson for young artist in our home school class, it is hoped that others may benefit from this also.

Texture may be thought of as a pattern that gives the effect of smooth. or rough, or something in between. This may be a repeated pattern but not always.

Adding texture gives realism and effect to a picture. It is the committed artist who masters texture because it requires observation, some (not much) skill, and patience. The secret of drawing texture is simple, observe the pattern and diligently recreate the pattern over and over. 

Before we begin take a moment and look at the area around you and see textures.

Our warm up is to draw a series of circles, in each circle draw a different texture, rough like wood, bubbles like soapy water, rough like sandpaper, leaves, diamonds, fur, puckered like an orange peel, etc.

For fun we will turn those circles to the fantasy armor of ancient warriors so each look like a shield; maybe the shield of a dwarf, fairy, elf, mermaid, wizard, etc. Some girls students designed princess clothing instead, they used three different textures in each design.

Below is an example from class.

Lesson on Texture.
Our second project was a choice of the students. They could choose from subjects:

     1. A stack of books, (focus on the texture of the pages edges).
     2. Tools including a hammer, (focus on the wood grain handle and rough puckered head).
     3. Oranges, (focusing on the rough puckered skin).
     4. A can of house-painter's brushes, (focus on the hard smooth texture).
     5. A slice of bread, (focus on the bubble texture).
     6. And students own clothing, (focus on the weave). 


(c)Adron Dozat

How To Add Texture in Watercolor Painting Lesson. 11/29/12

Spectrum Home School Community Art Lesson.
WATERCOLOR PAINTING WITH TEXTURE
ART 2 11/29/12

This lesson is designed for young art students. It is intended to introduce the concept of texture and offer an approach to create the effects of different textures and still have a fun time.

In watercolor texture requires observation and very little skill. First, observe the pattern and then recreate the pattern over and over. 

We will do several projects. Our first project will be to paint a series of circles in the light pale wash, make each circle a different color if you wish. AFTER THEY DRY (you may start a second project while they dry),  use a small or liner brush and using the brush as if you were using a pencil draw the pattern in the circle; to do this we use only the very tip of the brush- some younger students have a hard time with this concept.  We use a darker version of the original wash or harmonious color.

The patterns could include diamonds, scales (a series of "U"s touching each other), leaves drawn like spades or hearts overlapping, foam (bubbles touching each other), wood (wavy lines in parallel), dimple for the hammered metal, etc. There is an infinite variety of textures you may find your own.

Below is an example:

Texture in watercolor.
The Wizards Dragon Scale Shield.
For fun and to engage the imagination we took the circles with the textures and designed shields used by fantasy warriors. The wood textured was for the human, the scale texture pattern was the Wizard's, the dwarf had the bejeweled shield, Mermaid people had the bubble pattern shield. Some young ladies designed princess clothing instead, they used three different textures in their designs.

Our second is to paint a barrel with green plants in the top. We did the under-painting in pale wash, then we set it aside to work on other projects.  AFTER IT DRIED we returned and with darker colors painted in the details.

When we painted in the darker details we changed our attitude in our handling of the paintbrush. The paintbrush was used to "draw" the details. We used only the very point of the brush.

Below are two examples done in a class of the project, the one on the left is partially done the one on the right is mostly done.

Example of texture in the watercolor project.
For variety, we added a smokey background.

Note that the barrel on the left is pale, this is the under wash. Notice the areas of the under wash are vague and without detail.

The example on the right has a detail that was added in after the under wash dried. These details were added with the tip of the brush since we were using the brush to draw.

The dark bands were blue in the under wash, then darker color was dabbed using the tip of the brush.

The leaves were drawn with a darker green over the light green. A little scarlet red was added to the green to give the shadows.

The floor was washed in blue and after it dried we went over the floor with a grey for the flagstones.
(c)Adron Dozat

Thursday, November 15, 2012

Negative Space in Drawing Lesson 11/15/12 Art 1

Art 1 November 15
Negative space.

For warm ups we will be doing some shading exercises. 1. Using the "Cheek" of your pencil shade in some squares. 2. Shading comet where the tail gets lighter in value. 3. Draw a family all in silhouette, including a pet. 4. White dots by shading the areas around the dots. 

We are going to work in negative space where the area surrounding the point of interest is dark and the subject is left white.  (There is more than one definition of negative space. Here we use the idea of developing the area around the subject and leave the focal point white or at best minimally developed.)

Students may choose several projects: A white boat on the dark sea, a seagull in the dark sky, a white flower in a dark garden, a white swan on a dark lake or a white cat in a dark room. In these projects the focus is left undeveloped but the background and surrounding area is drawn in.


Warm up exercises for Art I lesson,
_______________________________________________________

Illustrations of Negative Space Projects 
Illustration of Negative Space Project for Art 1 Lesson

Illustration of Negative Space Project for Art 1 Lesson. 

(c)Adron Dozat


Thank you for visiting my blog.  I hope this project is fun and helpful for you. 

To find more like it see the labels at the right, use the search-box above, or choose one of the favorites in the left sidebar.  I am sure you will find one you like.

Adron


These are free to print but your small gift will help me keep this blog going, Choose your gift amount.

Use the share buttons below to share this, Thank you.

Negative Space In Painting. Lesson For Art 2

Lesson plan for Art 2
November 15
Using Negative Space

Today we are developing the idea of leaving a point of interest white while developing the areas around as in negative space. (There is more than one definition of negative space. Here we use the idea of developing the area around the subject and leave the focal point white or at best minimally developed.)

We will have a demonstration of wash and wet into wet technique. Wet a large area, using a mix of the watery medium drop in watery color. We are not painting a wall- don't stroke medium back and forth but let it flow, blend, and mix on its own allowing for texture.

Students may choose from several projects, White boats on a lake, seagull, white flowers, white cat on dark background.

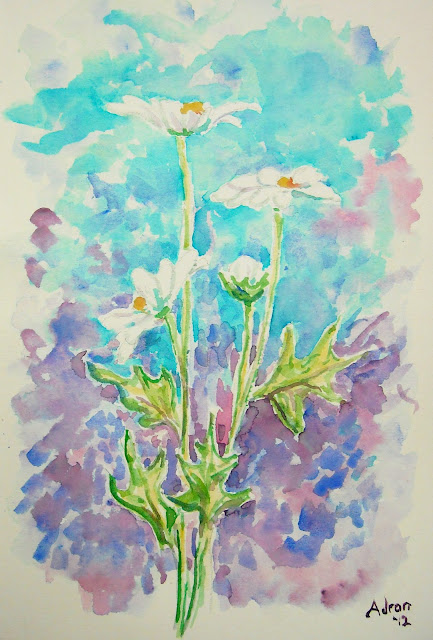
The illustrations below were done in about 40 minutes; notice the white of the flower and the white of the boats are not painted but left uncolored using the technique of negative space so the white of the paper shows through. The background texture was done with a wash and drop-in technique.


White Flowers in negative space art lesson illustration

White boats in negative space art lesson illustration


(c)Adron Dozat

Thursday, November 8, 2012

Lesson Plans For Art 2 November 8


Art 2

Today we will finish our unit on expressive drawing. We did facial expressions and body language expressions. Today we will explore mood in a drawing.

Warm ups. First: draw lighting bolts with a heavy hand so the lines are hard and rough. 2: draw teardrops but with a light hand so they are very "See Through" 3: Draw  rows of daisies.

Our class project using stuffed toys for models students will be to draw one example each of a dark mood and a light mood, the stuffed toy may be posed and given expression to reflect the mood.. The dark mood could be drawn with a heavy hand or darkened background or darker pencil etc. The light mood could be  with a light hand or wispy lines or using texture, the toy may be posed and given expression to reflect the mood.

If times allows a kitchen utensil will be staged to draw in this third the students must draw it with a mood and label the mood

Demonstration of watercolor technique. Wash and Wet into wet. Students will follow an example of water color and paint a rural road scene.

Supply list for the water color unit will be given out.

(c)Adron Dozat


Lesson Plans For Art November 8/2012

Art 1


Today we will finish our unit on expressive drawing. We did facial expressions and body language expressions. Today we will explore mood in a drawing.

Warm ups. First: draw lighting bolts with a heavy hand so the lines are hard and rough. 2: draw teardrops but with a light hand so they are very "See Through" 3: Draw  rows of daisies.

Our class project using stuffed toys for models students will be to draw one example each of a dark mood and a light mood, the stuffed toy may be posed and given expression to reflect the mood.. The dark mood could be drawn with a heavy hand or darkened background or darker pencil ect. The light mood could be  with a light hand or wispy lines or using texture, the toy may be posed and given expression to reflect the mood.

If times allows a kitchen utensil will be staged to draw in this third the students must draw it with a mood and label the mood


(c)Adron Dozat

Thursday, November 1, 2012

Lesson Plans for Art 2 November 1


Art 2 November 1

This week we are continuing our theme of expression in drawing.

We will warm up with a quick sketch of the wooden manikin.

We will review drawing human proportions with basic line-drawing; this is something like a stick figure but more full, jointed, and rounded. 

We will draw several practice drawings of people in expressive poses; such as joy, sorrow, anger, etc.

Students will draw an imaginary scene where the central figure is posed expressing an emotion of their choice. This can be any style they choose, fantasy, realism, etc. must be drawn at least in part in charcoal. 

Long term project is due.


(c)Adron Dozat

Lesson Plan for Art I November 1

Art 1 November 1

This week we are continuing our theme of expression in drawing.

For warms up we will draw some straight lines and dots. 2. Lines that are curved and circles. 3. Peanut shapes. 

We will practice drawing human proportions with basic line-drawing; this is something like a stick figure but more full, jointed, and rounded. 

We will draw several practice drawings of people in expressive poses; such as joy, sorrow, anger, etc.
We will use the wooden model we will draw several poses that have different expression 

Students will draw an imaginary scene where the central figure is posed expressing an emotion of their choice. This can be any style they choose, fantasy, realism, etc.

Long term project is due.


(c)Adron Dozat