Spectrum Homeschool Art 2
Printmaking Week 3
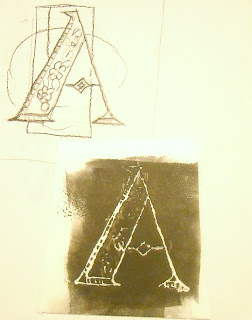
This week we used Styrofoam to create as a block to make a plate for our print. Styrofoam plates were cut to a workable size then the image was drawn with a pencil onto the Styrofoam plate pressing hard enough to leave an impression. The plate was inked using a brayer, paper was pressed onto the plate and the image transferred.
Each student did the letter from their name. (Apologies; the instructor forgot to mention the very important mirror effect of printmaking- everything comes out backwards.)
Students created several images.
 |
| Illustration of print making class work |
The illustration above shows the rough sketch, top, used to design the block, below. The block has been inked the white is the area depressed by tracing the design onto the Styrofoam.
 |
| Printmaking Class Block and two prints- mirror image. |
The illustration above shows the block, center, and two images created by the block. Note the image is reversed.
Thank you for visiting my blog. I hope this project is fun and helpful for you.
To find more like it see the labels at the right or choose one of the favorites in the left sidebar. I am sure you will find one you like.
Adron
(C)Adron Dozat